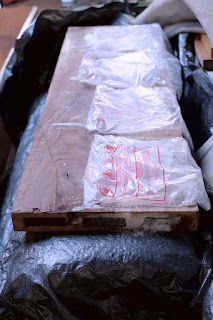
Do you know what this is not?
This is not good.
Around cocktail hour, I will often pick out the dust in the bug roads in the wood. I'll sit and talk with Annie if she's making us something to eat. And dig out the bugdust. One morning after moving the pile I noticed some piles of dust. Didn't believe it could be, so I isolated that particular board as well as putting the whole damn pile under double secret observation and reporting.
Well, somehow after three days at 180F, that one board still had living eating wood bugs. That's the offender above. I suspended it to see if the cones appeared. It was only that one board.
So if the fires of hell didn't kill them, I thought I'd show them zero mercy and freeze the heaven out of them.
60 pounds of dry ice, with 8" of insulation above and underneath. Opened it after three days and there was still dry ice in my death trap.
Left the board out a couple days to have it come to it's senses. I saw no damage from the -108 F of the dry ice.
And folks there's going to a bunch of pics here but I have an intermission for you.
A thin slice of one of the boards I was cutting to final width. Yes, bug holes.
Between the life and cold cold death drama, here's a recap.
Starting to layout final positions of the separate boards. This shows my main visual. The widest board was resawn and opened up to lay opposite each other across the middle breadboard.
Nothing's glued here, just looking at it together.
Gluing up the two large middle portions.
The two large panels are to joined to the three breadboards with mortises and floating tenons.
I wanted the mortises to be as deep as I could make them (with a machine!!). Used this bit on the horizontal mortising attachment. Not even sure what the name is of this bit. It takes a deft hand, I tell you, to use it. Straight flutes so sawdust doesn't evacuate very easily so the bit burns. I almost cleaned it off after each hole was cut. But the straight flutes allows to cut as you sweep back and forth. But it only likes to cut maybe 1/16" per pass. Anymore than that and it'll squawk at you. Also the size of the hole is different depending upon cutting into end grain (like here) or face grain. And that makes fitting the tenons more difficult.
Does cut 4" deep though.
A four foot board longitudinal in the mortising attachment racked the whole mechanism. Was a constant minute adjustment with the rolling device holding up the free end.
It was a half inch bit but I wanted a bigger tenon so everything had to be run through twice for a one inch tenon.
Although the mortises appear to be outside the lines, it's because I want to let the other board to expand and contract. The bigger hole allows for the anticipated movement.
Ok. Intermission time. Take a break, See you in a bit.
Mmmmm. That was nice.
The tenons and starting to fit them in the holes with the varying sizes.
Don't understand how the rest of you can get by without Apple Boxes. Needed this many for a couple of operations.
The large panels will have the tenons glued into them, the breadboards will be square pegged to allow for the movement. Also they will be drawbored. Just because I'm not sure of your knowledge, but a drawbore is when a hole is offset from another and the peg that drives through forces that offset into a tighter fitment.
Drilling out on the drill press. Take a look at that chuck. Chewed up pretty good. From the first day I had the drillpress, it was hard to tighten up bits enough with the supplied chuck key. So I started to use opposing pipe wrenches to tighten up the bit. It is bombproof. The bit just will not slip.
Squared off the round hole mainly with these corner chisels. They can be fussy too. Real easy to cock them off square.
Tenons glued into the large panels.
Used the plunge router to cut the slots in the tenons.
And we're stopping here with the pegs being fitted, driven in and roughly sawed off.Here's your bonus shadow of wire pic!!


