These pics of the new firelight light are not what I'm here to talk about.
And neither are these process photos.
But I'll go through what you're looking at here.
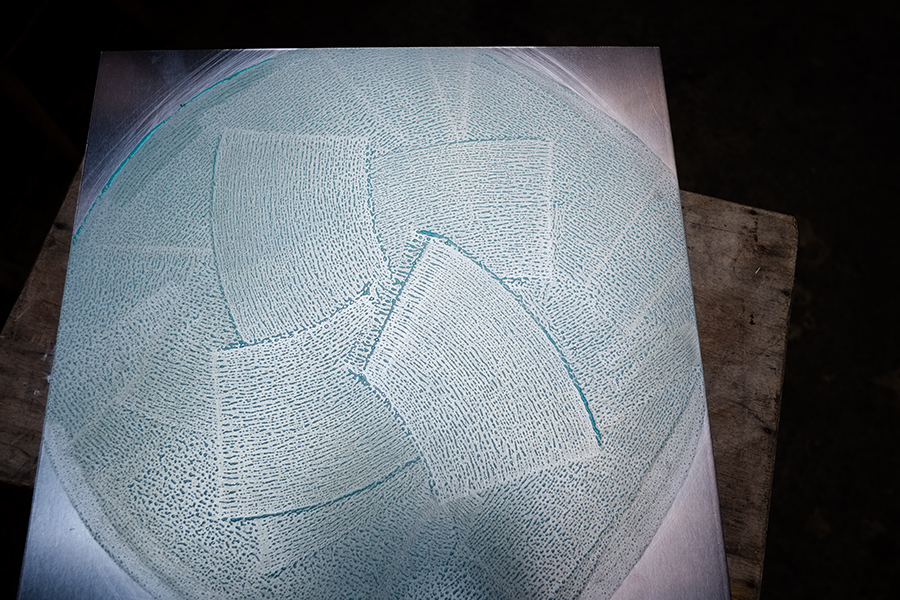
These are from the second go-round of turning square pieces of plywood and aluminum into round pieces. If you're so inclined, this is a more detailed look at the first round here.
It's all training.
I did 15 years maybe doing Aikido and there was this idea continually talked about during that time of spending time off the mat as Aikido training. As in how you go through life is Aikido training. Sweeping the dojo mat after practice is not the mere act of cleaning but an act with thought and intention. Paying attention to the movements of your arms with the broom, how the broom gathers the dust, the swish of the broom across the mat.
The aluminum squares needed to be roughed up for the cement to work better so each square I did with purpose and intent. Each different. It was training, I wasn't trying to get them done just to get them done but done to roughen my mind at the same time so my cement works better.
Training to strike the center with one act.
Two apple boxes on a wheels with a lazy Susan made a rolling turntable. Put the cement on in one turn and meet where I began.
Purposefully directed the center to be something. Each different and unique.
The two shall become one.
Saw the negative space and let a loaf of bread cool there out of the oven
But none of this is what I'm here for today.
Tony in mid shake stops to welcome officially the two newest into the Circlehood.
Welcome Frank on classical guitar
Along with Ken with his mello cello
And that's what this is all about. Good to have you two.
Sunday, January 5, 2020
Tuesday, December 24, 2019
And On the Ninety Third Day
He Created Light.
and he's not too sure about it yet....
Lots of photos so I'll do this in a couple of posts.
Started some three months ago when Will and I made the trip out to Aborica. If you want to read about that then go here, if not then the take away shot is the two pieces of wood that came out of it.
One of the pieces on the left will become a light for the kitchen. There's been a temporary shop tube light forlornly hanging there since the inception.
Chose the tall red gum eucalyptus and ran it though the planer on a sled. It was warped pretty good so had to hold it in place to be able to flatten.
Dust collection couldn't keep up with the amount of shavings.
One end was naturally round so I cut the other to mimic with this saw.
It was difficult to tell the wood from the bark on the live edge so it took some effort to pick away at with various implements.
Shot quite a few coats of shellac and rubbed that out to a mirror finish. At the same time I shot the other piece of wood, the walnut. That was fortunate as a large wine job landed and I used both pieces of wood as surfaces and backgrounds.
A couple cropped for you vignettes
A couple of the walnut.
And there the project stopped so I could do the wine job for the next three weeks.
53 photos later of wine and food in restaurant and home sets we're back on it.
Time to move onto the light holding devices themselves.
A simple steambox was constructed which in the end I didn't use too much.
I resawed two wood species. The leftover wood from the large patio doors I built...a salvage Ponderosa Pine from Camp Mather in the foothills and also some vertical grain Douglas Fir.
I was aiming for right around 1/32" thickness. Anything more, light would be difficult to pass through, anything under that was impossible for me to cut. It consistently miked out at 1/32" or a few thousand under.
To hold the actual light source I made some eggcrate crosses and then cut them round.
End of part One.
and he's not too sure about it yet....
Lots of photos so I'll do this in a couple of posts.
Started some three months ago when Will and I made the trip out to Aborica. If you want to read about that then go here, if not then the take away shot is the two pieces of wood that came out of it.
One of the pieces on the left will become a light for the kitchen. There's been a temporary shop tube light forlornly hanging there since the inception.
Chose the tall red gum eucalyptus and ran it though the planer on a sled. It was warped pretty good so had to hold it in place to be able to flatten.
Dust collection couldn't keep up with the amount of shavings.
One end was naturally round so I cut the other to mimic with this saw.
It was difficult to tell the wood from the bark on the live edge so it took some effort to pick away at with various implements.
Shot quite a few coats of shellac and rubbed that out to a mirror finish. At the same time I shot the other piece of wood, the walnut. That was fortunate as a large wine job landed and I used both pieces of wood as surfaces and backgrounds.
A couple cropped for you vignettes
A couple of the walnut.
And there the project stopped so I could do the wine job for the next three weeks.
53 photos later of wine and food in restaurant and home sets we're back on it.
Time to move onto the light holding devices themselves.
A simple steambox was constructed which in the end I didn't use too much.
I resawed two wood species. The leftover wood from the large patio doors I built...a salvage Ponderosa Pine from Camp Mather in the foothills and also some vertical grain Douglas Fir.
I was aiming for right around 1/32" thickness. Anything more, light would be difficult to pass through, anything under that was impossible for me to cut. It consistently miked out at 1/32" or a few thousand under.
To hold the actual light source I made some eggcrate crosses and then cut them round.
End of part One.
Let There Be Light
This was the process for making the shades. First constructed some out of the Ponderosa Pine but in the end did not like how it looked next to the Eucalyptus and so did the Doug Fir for real.
Some shavings from fitting the eggcrate crosses.
The long strips of veneer were first epoxied to the crosses.
Then the veneer was joined together where it met. Ended up using magnets for clamping pressure as ordinary clamps were just too heavy and awkward to use without them splitting the veneer.
Also do not use the magnets without a sheet of waxed paper in between. You've been warned.
I've been matter of fact about the process of gluing the veneer into shades but don't let that fool you. It was a 3-4 cocktail at the end of the day process just to ground me enough to do more the next day. Made quite a few more than I ended up using because there was a lot of attrition by cracking or by me throwing it against the wall in fits of unbridled fury.
I'm very glad I read the I Ching all those years.
"Perseverance is the Way of the Superior Man," I kept repeating to myself.
The Euc will be the holder of the shades and everything had to be done with it being suspended.
Two SkyHi Combos along with two C-Stands allowed me to assemble everything.
Cabled it to the ceiling (twice). I didn't like my initial height on it.
Wired a dimmer switch to it, turned it on.
I will wait for one year to determine whether I scrap it and start over. It is growing on me, the light coming off of it is like firelight. So warm and beautiful.
The veneer was jointed and then glued into longer strips.
Some shavings from fitting the eggcrate crosses.
The long strips of veneer were first epoxied to the crosses.
Then the veneer was joined together where it met. Ended up using magnets for clamping pressure as ordinary clamps were just too heavy and awkward to use without them splitting the veneer.
Also do not use the magnets without a sheet of waxed paper in between. You've been warned.
I've been matter of fact about the process of gluing the veneer into shades but don't let that fool you. It was a 3-4 cocktail at the end of the day process just to ground me enough to do more the next day. Made quite a few more than I ended up using because there was a lot of attrition by cracking or by me throwing it against the wall in fits of unbridled fury.
I'm very glad I read the I Ching all those years.
"Perseverance is the Way of the Superior Man," I kept repeating to myself.
The Euc will be the holder of the shades and everything had to be done with it being suspended.
Two SkyHi Combos along with two C-Stands allowed me to assemble everything.
Viewing some of the lights during the assembly process.
Reflected in the espresso machine.
The entire setup was put on wheels and directed into the kitchen area.
The SkyHi's go up to 15' so I lifted it a bit at a time into final position.
Cabled it to the ceiling (twice). I didn't like my initial height on it.
Wired a dimmer switch to it, turned it on.
I will wait for one year to determine whether I scrap it and start over. It is growing on me, the light coming off of it is like firelight. So warm and beautiful.
Subscribe to:
Posts (Atom)